Manage Sales Territories
The Manage Sales Territories Sales Solution helps reduce the cost of sales and channel conflict by defining territories on new and existing opportunities. You provide a list of one or more of your customers and some basic company information.
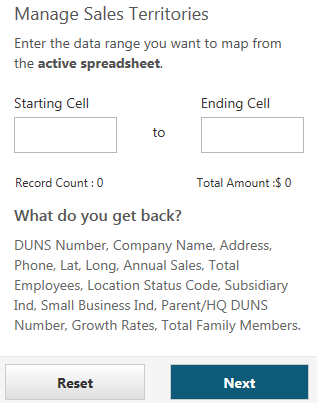
Twenty-six data points are returned.
- Status
- Remarks
- D-U-N-S Number
- Confidence Code
- Match Grade
- Company Name
- Doing Business As
- Street Address
- Street Address2
- City
- State Abbreviation
- Postal Code
- Country
- State/Province
- Latitude
- Longitude
- Telephone Number
- International Dialing Code
- Annual Sales (USD)
- Total Employees
- Employees Here
- Location Status Code
- Subsidiary Indicator
- Small Business Indicator
- Parent D-U-N-S Number
- HQ D-U-N-S Number
- Headquarters Parent Company Name
- Total Family Members
- Third Year Sales Growth Rate
- Third Year Employees Growth Rate
The data dictionary describes the data elements in more detail.
The cost of the solution is per record but you can submit a list of companies for any transaction. The total cost will be calculated and must be confirmed before the deduction is made from your balance.
NOTE: You will not be charged if your search criteria results in no matches.
In trial mode, you can process only one record per request. Each request totals one credit for the business solution. The D-U-N-S Number and telephone numbers are masked in the sample results for trial users. Buy credits to get the full range of information.
Steps To Manage Your Sales Territories
- For Excel 2013 users, using the app, go to Sales Solutions, then select Manage Sales Territories. For all other users, locate the Dun & Bradstreet tab in Excel, click on Self Service Solutions, and select Manage Sales Territories.
- Enter information to narrow results.
- DUNS Number is required.
- Contact Name is optional.
- Job Title is optional. Up to three job titles can be added.
- Filter By Contact Info is optional.
NOTE: If you do not have a DUNS Number you can Verify Your Business.
- Click Next.
- Select the contact names for which you would like to get more contact information.
- Click Load.
- Click Accept to confirm the amount charged to your account.
- Select an empty data cell or create a new worksheet to place the results.
- Click OK.
- The results are inserted into the selected data cell.
- © Dun & Bradstreet, Inc. 2019 – 2025. All rights reserved.