Integration with CRM Leads
D&B360 allows existing CRM leads to be matched against D&B's database and then linked for future updates. New CRM leads can also be added and linked in one step. Lead records within the CRM can always be unlinked if needed.
NOTE: The option to Add (or link) D&B records to multiple CRM accounts or leads is configurable by your local system administrator.
Whether you can add a company as an account or lead depends on the level of your organization's D&B360 account or lead. Some user roles have limited ability to add companies as accounts or leads. If this is the case for your user role, the + icon does not display in the Add column.
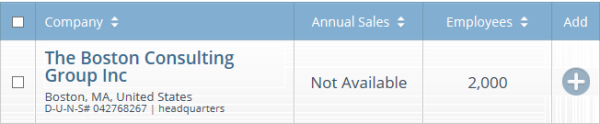
- Search for a company.
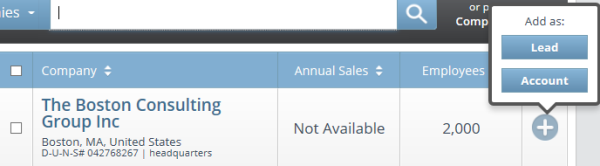
- Locate a company in the search results. Click the plus (+) icon for that company in the Add column.
- In the Add As pop-up, click on Lead or Account.
NOTE: The option to add as leads is platform-specific. "Lead" will be grayed out if unavailable for your platform.
- The Account, Lead, or Lead and Account icon displays next to the company.
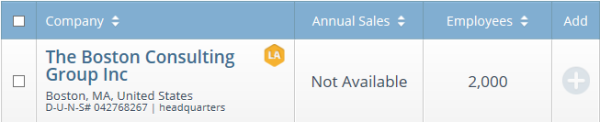
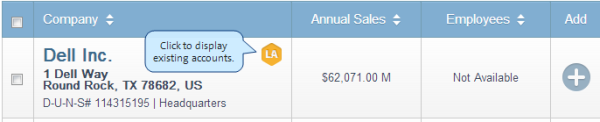
If a company is already linked to a Lead in your CRM, an icon with the letter L displays. If a company is already linked to both an account and a lead, the LA icon displays, as shown in the following illustration.
To display companies that are duplicate Leads, click the L or LA button.
NOTE: The option to Add (or link) D&B records to multiple CRM accounts or leads is configurable by your local system administrator.
Linking a Lead to D&B360
Link leads that already exist in the CRM. If they do not already exist in the CRM, you will need to add/create them in the CRM and then link the accounts. Leads within the CRM can always be unlinked if needed.
Once you have added the lead to the CRM, you will be able to link the lead to D&B data.
NOTE: The way your D&B360 administrator sets your user role will determine whether you can link or unlink D&B data to existing CRM leads.
- Select one of the following options:
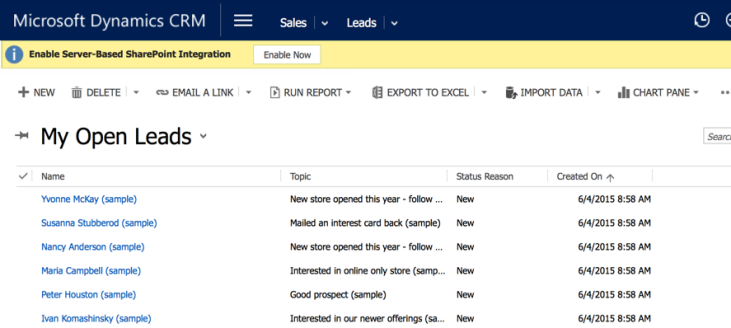
- In the CRM window, select Sales (or Marketing), and then Leads.


- In the My Open Leads window, click the name of a Lead who is not currently linked to D&B data and that you want to link.
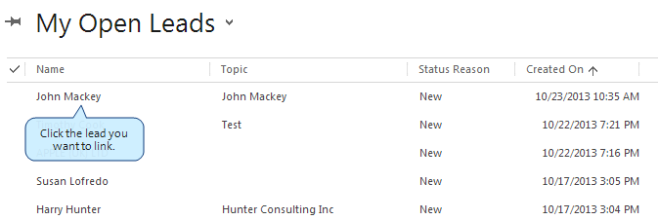
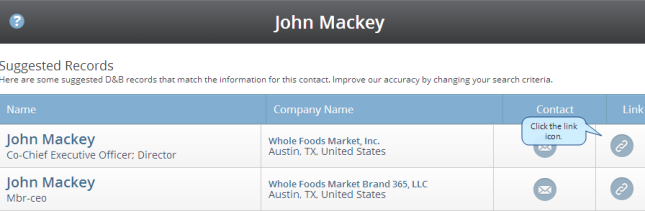
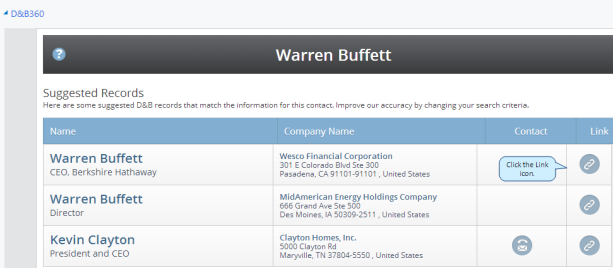
- Scroll to the D&B360 area to view the Suggested Records.
- Click the Link icon to link this Lead to D&B data.
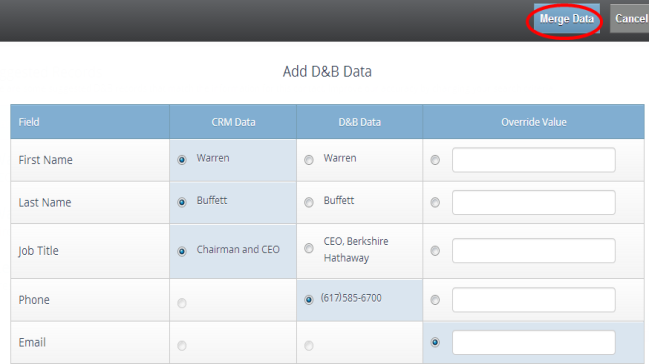
- In the Add D&B Data window, review the CRM Data and D&B Data columns for each field.
NOTE: The fields displayed are based on the fields supported by the CRM being updated.
- In the Override column, you can type in any values you believe are incorrect or that you want to revise.
- Click Merge Data to link the Contact to D&B Data.

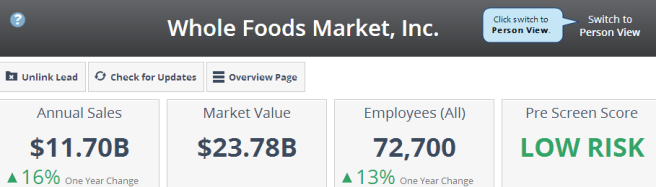
After the software adds D&B Data for this Lead, the mini Person Overview window displays.
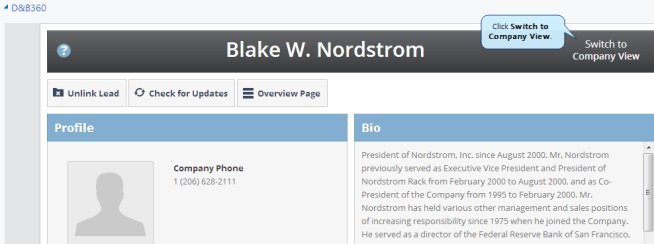
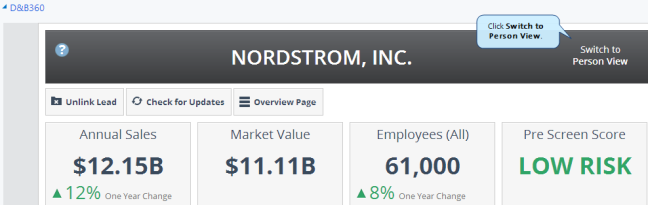
When you link a person as a Lead in the CRM, and link it to D&B Data, the company for that person is also added. For example, we added Blake W. Nordstrom as a Lead, and both the Company of Nordstroms and the CEO, Blake Nordstrom, were added to the Lead.
- Click Switch to Company View to see the Company Overview window for the company associated with this person.

- Click Switch to Person View to see the Person Overview for Blake W. Nordstrom.
- In the CRM window, click the name of a Lead that you would like to link to D&B data.
- Scroll to the D&B360 area to view the Suggested Records.
Click the Link icon to link this Lead to D&B data.
- In the Add D&B Data window, review the CRM Data and D&B Data columns for each field.
- In the Override column, you can type in any values you believe are incorrect or that you want to revise.
- Click Merge Data to link to D&B Data.
- After the software adds D&B Data for this Lead, the mini Person Overview window displays.
When you link a person as a Lead in the CRM, and link it to D&B Data, the company for that person is also added. For example, we added Blake W. Nordstrom as a Lead, and both the Company of Nordstroms and the CEO, Blake Nordstrom, were added to the Lead.
- Click Switch to Company View to see the Company Overview window for the company associated with this person.
- Click Switch to Person View to see the Person Overview for Blake W. Nordstrom.
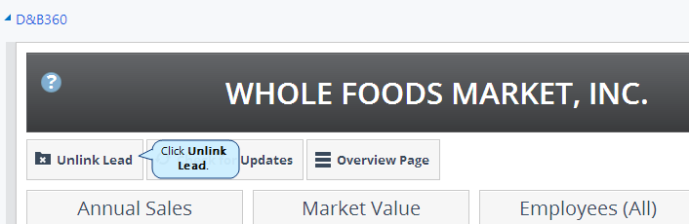
To unlink the D&B Data associated with a lead from the CRM records, when the mini Overview window for a company or person you have linked as a Lead displays in the CRM window, click Unlink Lead.
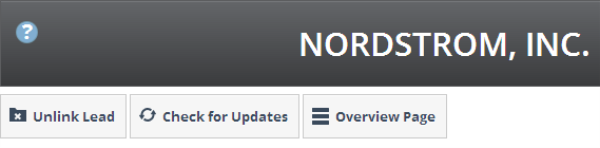
You can check for updates and merge any new information for an account or person.
- Click the Check for Updates button.
- In the Add D&B Data window, review the CRM Data and D&B Data columns for each field.
- In the Override column, you can type in any values you believe are incorrect or that you want to revise.
- Click Merge Data to link to D&B Data.
Modifying the D&B Match Flag for Leads
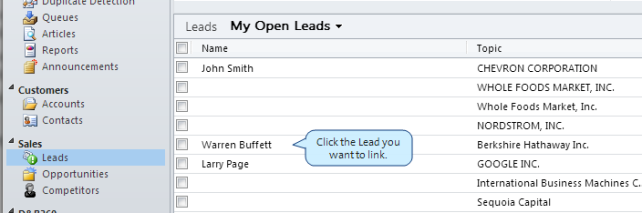
The batch processing of leads allows you to pick which leads you want to include / exclude from a Batch. Setting the lead flags will help in situations where you have a large number of leads but only need to cleanse the data for a select number of them. There are three options for setting the lead flags and all three are done from the CRM.
To avoid any performance issues, please limit the number of records to 50K at a time.
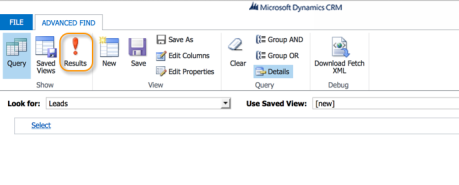
- From the Microsoft Dynamics main menu, click the Advanced Find icon.
- On the Advanced Find Look for field, select Leads from the drop-down. Then click Edit Columns.
![]()
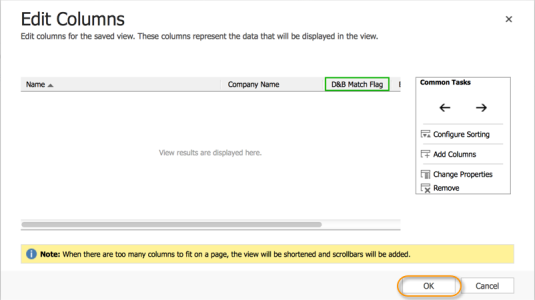
- On the Edit Columns window, click on Add Columns in the Common Tasks section.
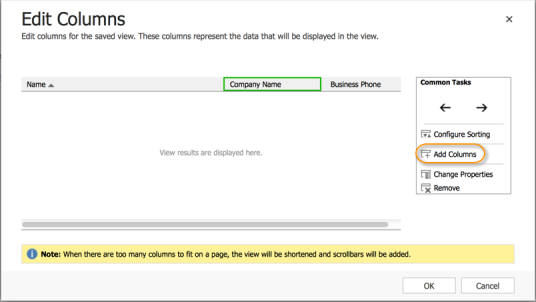
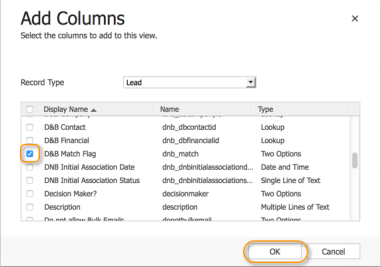
- On the Add Columns window, select the D&B Match Flag and click on OK.
- On the Edit Columns window, click OK.
- Back on the Advanced Find tab, click on Results. (You may want to enter criteria (using Select) to filter the records you want to process.)
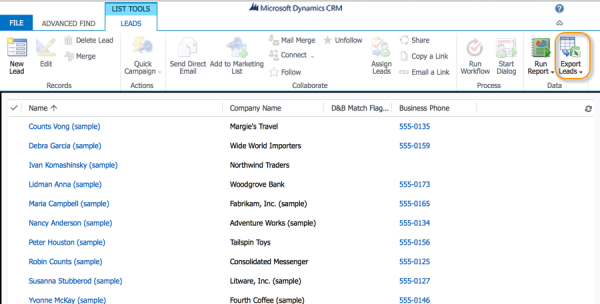
- On the List Tools tab, click on Export Leads.
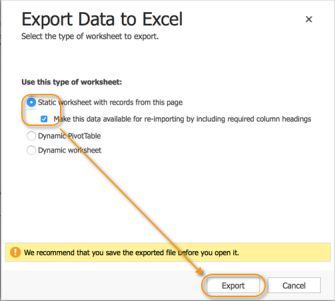
- If prompted with a window to specify the export format, do the following:
- Select Static worksheet with records from this page.
- Select Make this data available for re-importing by including required column headings.
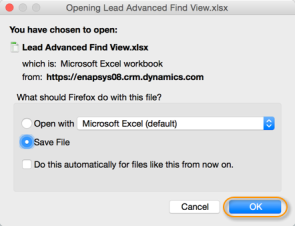
- Click Export.
- Save the file.
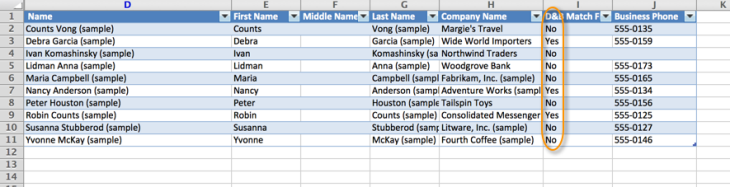
- Open the file you saved in Excel and set the D&B Match Flag values for each record. (The field accepts Yes and No values.) Save the updated file.
Re-importing the Updated Leads Flag Values
Now you’ll need to re-import the leads information with the updated flag values.
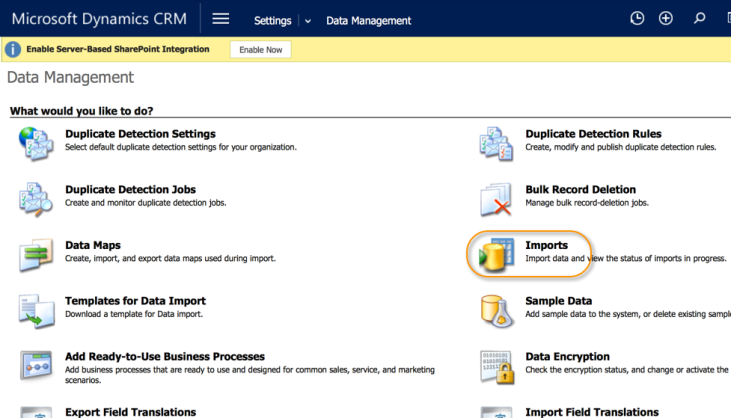
- In Microsoft Dynamics CRM, go to the main menu, click Settings. Under System, click Data Management.
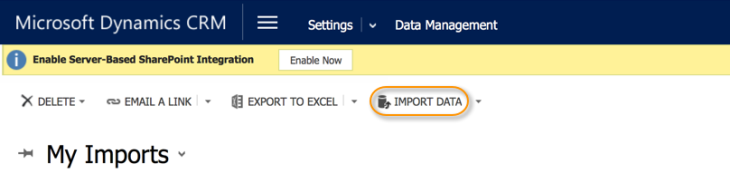
- Click on Imports.
- Click on Import Data.
- Select the recently created file and then click on Next.
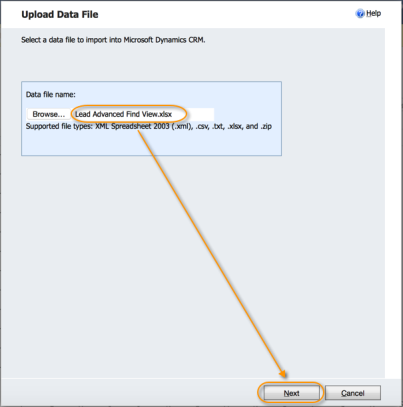
- Use the default parameters and click on Submit.

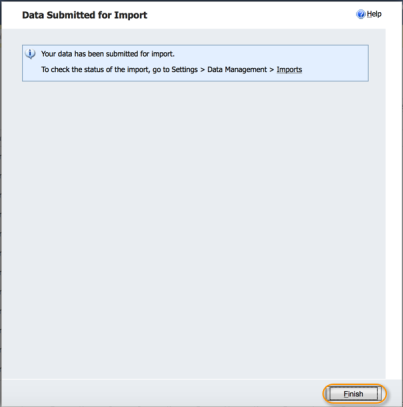
- When you see the confirmation message, click Finish.
Checking the Status of the Import
The process will take some time depending on the number of records being imported.
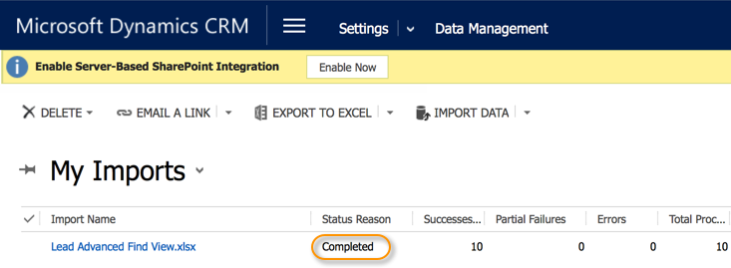
To check the status of the import job, go to the Microsoft Dynamics CRM main menu, click Settings. Under System, click Data Management.
Locate your file reference and check the Status Reason column. When you see a status of Completed, the import is done.
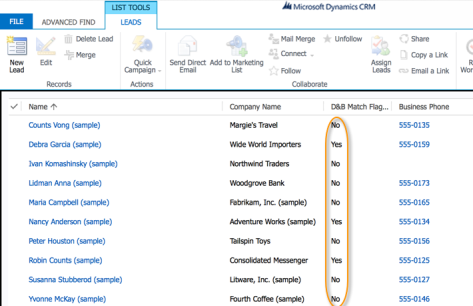
Use the Advanced Find to search for the Leads and you’ll see the leads processed with their new values.
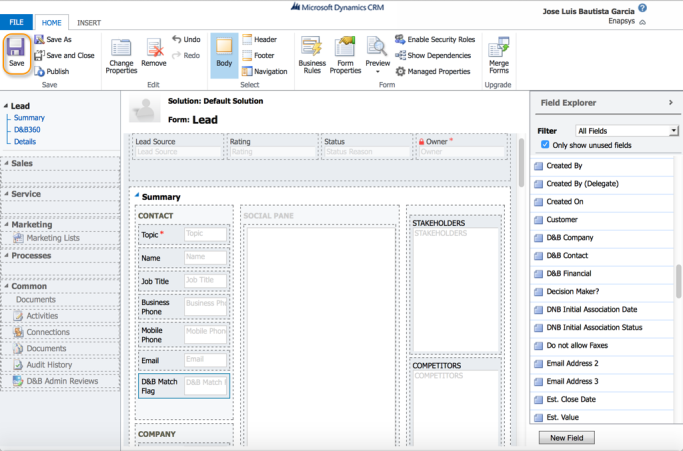
This option shows you how to include the D&B Match Flag on the Lead Form. Users will be able to pick individual Leads to be included / excluded from the Batch Match. Depending on your release strategy, you may want to implement this as a solution and transfer it to your different environments.
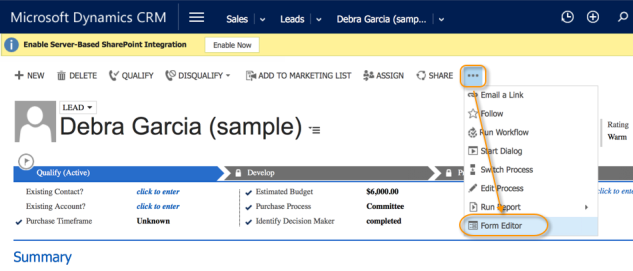
- In the Microsoft Dynamics CRM, go to the Main menu, click Sales, then click Leads.
- Select any lead.
- Click on the three dots icon and select Form Editor.
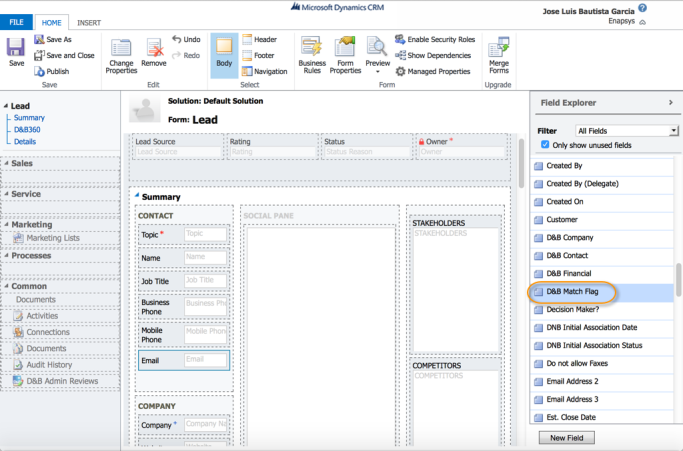
- On the Field Explorer, find the D&B Match Flag.
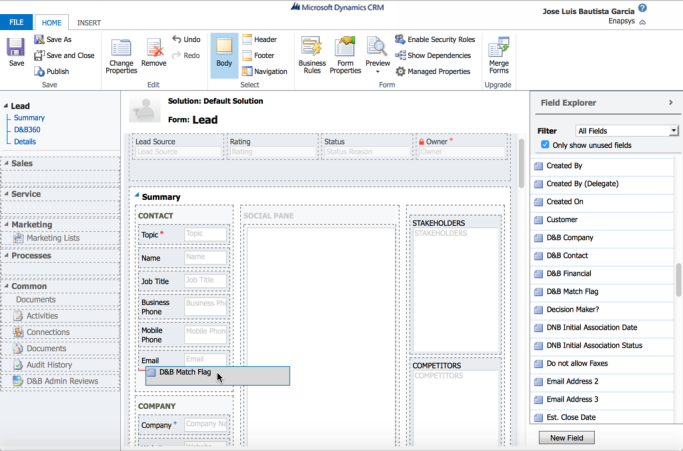
- Drag the D&B Match Flag and drop it on the desired place on the Form.
- Save the modified form.
- Click Publish.
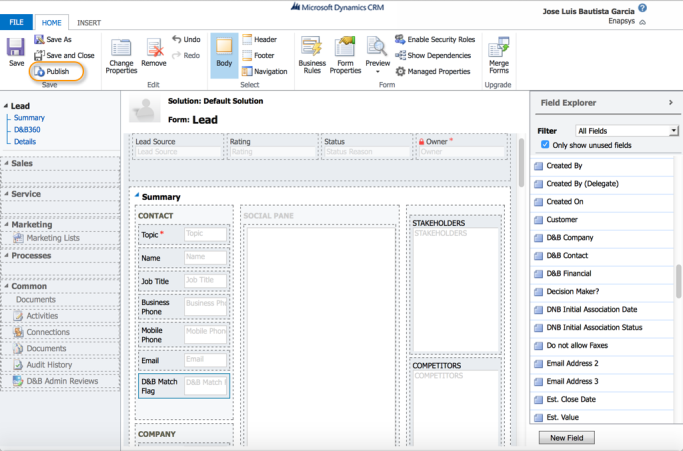
- The D&B Match Flag field now displays on the screen. If you do not see the field, click Refresh.

NOTE: This option is only valid for OnPrem installations.
For On Premise installations, you can execute a query to modify the D&B Match Flag using the following templates:
For MSD 2013 and MSD 2015
To set the D&B Match to YES for a Lead:
UPDATE [<ORGANIZATION>_MSCRM].[dbo].[LeadBase] SET [dnb_Match] = 1 WHERE <SELECTION_CRITERIA>;
To set the D&B Match to NO for a Lead:
UPDATE [<ORGANIZATION>_MSCRM].[dbo].[LeadBase] SET [dnb_Match] = 0 WHERE <SELECTION_CRITERIA>;
For MSD 2011
To set the D&B Match to YES for a Lead:
UPDATE [<ORGANIZATION>_MSCRM].[dbo].[LeadExtensionBase] SET [dnb_Match] = 1 WHERE <SELECTION_CRITERIA>;
To set the D&B Match to NO for a Lead:
UPDATE [<ORGANIZATION>_MSCRM].[dbo].[LeadExtensionBase] SET [dnb_Match] = 0 WHERE <SELECTION_CRITERIA>;
- © Dun & Bradstreet, Inc. 2019 – 2026. All rights reserved.