Step 2: Defining Triggers for Batch Workflows
Before you can run batches automatically, you must define a trigger. The Trigger provides the ability to trigger, or initiate, Batch Workflow processes. These processes are based on specific files that a System Administrator places in a directory that D&B Integration Manager watches, or monitors. This directory resides in either the D&B Integration Manager application server or in a database table in the D&B Integration Manager local database or a remote database table as the Auto Batch Workflow, which your System Administrator defines.
You can specify the file name or file name pattern that you want D&B Integration Manager to search for. This allows you to automatically initiate running the batch based on a set schedule that your System Administrator defines. For example, to initiate the batch, you might enter workflowID*.txt. When D&B Integration Manager finds a file with workflowID*.txt, it automatically runs the batch process defined in the Workflow. You can configure this file with either the database or file pattern.
The Trigger scans only one shared directory on a specific host machine. If there is a need to change the directory location, the administrator must change the global trigger parameters. It is then necessary to restart the scheduler so that the parameters can take effect.
Steps for Defining Triggers
NOTE: You can set only one type of pattern at a time for a trigger.
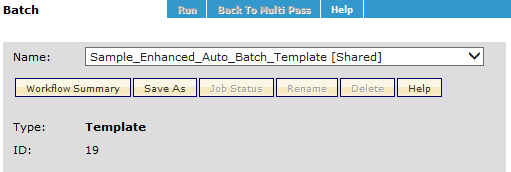
- On the Batch window, select the Auto Batch workflow template.
- Click Save As and type a name for the automatic batch job.
- In the Pre-Matching phase area, click Trigger.

The Trigger File Pattern/Database Pattern area opens where you can toggle between the patterns.
- Click click here to register.
- In the Enter Pattern Name field, type the name of the file you want to use for the trigger file search.
- Click Register.

NOTE: For any characters in a string, you can use the wildcard *. For an NLMI Batch Workflow, you can add a trigger for .csv, .xls and .txt files only.
NOTE: If the Workflow is configured with the file pattern but you want to register a database pattern instead, you can register the database pattern. In this case, the file pattern will be deleted. You can also cancel the database registration and retain the file pattern.
Steps for Defining Triggers Based on a Database Pattern
Pre-requisite: The table that you have select must have JOB_ID and TRIGGER_SEQfields.
- On the Batch window, select Sample_Auto_Batch_Template.
- Click Save As and type a name for the automatic batch job.
- In the Pre-Matching phase area, click Trigger.

- In the Trigger -> File Pattern area, toggle between File Patterns and Database Patterns.
- Click click here to register to register a new pattern.
- To register a new File Pattern, complete the following:
- In the Enter Pattern Name field, type the name for the new file pattern.
- Click Register.

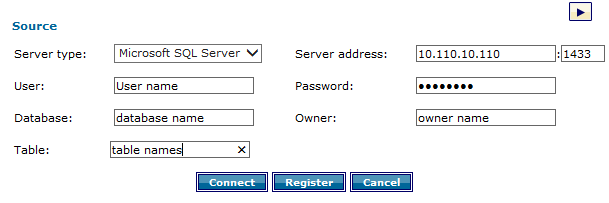
To register a new Database Pattern, complete the following:
- In the Server type field, select the type of database you want to connect to, either Microsoft SQL Server or Oracle.
- In the Server address field, type the IP address of the remote server.
- In the User field, type the user name for the database.
- In the Password field, type the password.
- In the Database field, type the name of the database you want to connect to.
- In the Owner field, type the name of the database owner.
- After the connection is successfully established, in the Table field, select the table name.
- Click Connect.
NOTE: If you successfully connect to the Remote database, the Table field displays the table names that the database contains. If you are unable to connect to the Remote database, retry.
After the connection is successful, select the table you want to use to trigger the job.
Click Register.

NOTE: You can register only one Database Pattern per workflow.

