Step 9: Defining Batch Data Views for Batch Workflows
A batch data view defines how D&B Integration Manager displays your matched results and your unmatched results. You use pre-defined data views to display your results. You can also create your own user-defined data views. In your data view, you define which fields display for your matched results and in what order. After you create a data view, you can assign it to a workflow.
You can define the following data views:
- Batch matched records
- Batch unmatched records
- Batch allrecords
- Batch logical site view of matched records
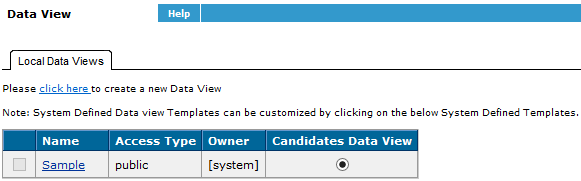
NOTE: For the NLMI Batch Workflow, only the Local Data View is available.
To create a new batch data view, use a template – or existing batch data view – or create a new batch data view not based on a template. To create a batch data view based on an existing data view (the template method), start with a current data view, save it with a new name, and change its parameters. For batches, you can create Matched Data Views and Unmatched Data Views.
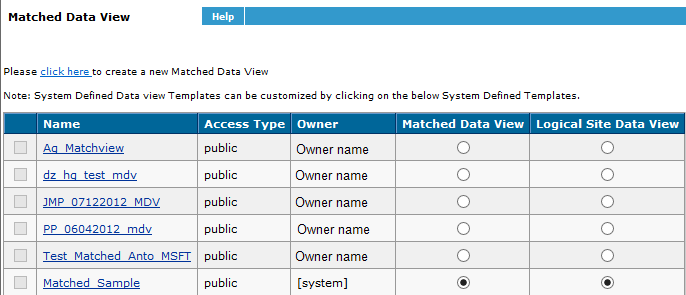
Creating Matched Data Views
For matched data views, attributes are available for these data element tables:
| Data Element Table | Contains … |
|---|---|
| Customer Basic Data | |
| D&B Basic Data | The most basic D&B elements, such as Company Name, Address, and so on |
| D&B Enhanced Data | Value-added enrichment on records licensed by your organization, such as |
| D&B SIC Codes | SIC codes |
| Keys & Normalizes values | Normalized valued of either D&B or customer inserted data elements. |
| Logical Site – Customer | The code associated with this match |
| Matched Indicators | The attribute Map or Pass that indicates the step where the best match is found, which as these options:
From the Data Element Category field, select the appropriate option and add it to the list. Select the desired field(s) and move to the list at the right. You can enter the DataView name and the list of Matched Indicators will display in the data view. |
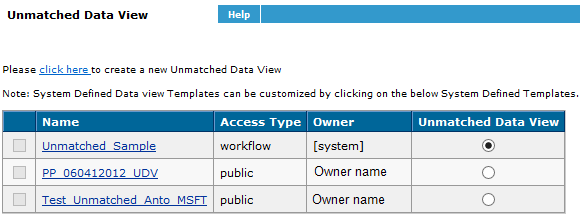
Creating Unmatched Data Views
For unmatched data views, you will find data attributes available for these data element tables:
| Data Element Table | Contains … |
|---|---|
| Customer Input Record | Attributes from the customer’s input record such as, City, State, Zip Code. |
| D&B Basic Data | Attributes for unmatched records with reason. |
The unmatched data view contains a Reason column. Select the option and add to the list. When you run a job, the Job Status shows the unmatched results with the reason Missed Confidence Code by # points.
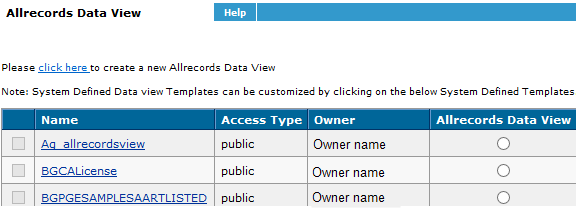
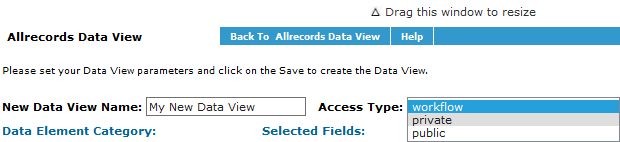
Creating an Allrecords Data View
| Data Element Table | Contains … |
|---|---|
| Customer Basic Data | |
| D&B Basic Data | The most basic D&B elements, such as Company Name, Address, and so on. |
| D&B Enhanced Data | Value-added enrichment on records licensed by your organization, such as |
| D&B SIC Codes | SIC codes. |
| Keys & Normalizes values | Normalized values of D&B elements. |
| Logical Site – Customer | The code associated with this match. |
| Matched Indicators | The attribute Map or Pass that indicates the step where the best match is found. It has these options:
From the Data Element Category field, select the appropriate option and add it to the list. Select the desired fields and move them to the list on the right. You can enter the DataView name, and the list of Matched Indicators display in the data view. |
| Customer Input Record | Attributes from the customer’s input record, such as, City, State, Zip Code. |
| Unmatched Indicators | Attributes for unmatched records with the reason why it is unmatched. |
Creating a Local Data View (only for NLMI Batch Workflow)
Available for these data element tables:
| Data Element Table | Contains … |
|---|---|
| D&B Basic Data | The most basic D&B elements, such as Company Name, Address, and so on. |
| D&B Enhanced Data | Value-added enrichment on records licensed by your organization, such as |
| D&B SIC Codes | SIC codes. |
Steps for Creating a Batch Data View
- On the Home page window or the Navigation window, click Batch.
On the Batch window, in the Name field, select a Batch Workflow template.

- In the Post-Matching phase area, click Matched Data View, Unmatched Data View or Allrecords Data View.
- In the Data View area that opens, to create a new batch data view:
- Click click here.
- In the Data View area, New Data View Name field, type the name of your new data view.
- In the Access Type field, select public or private.

— or —
To create a batch data view based on an existing data view:
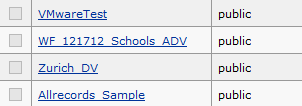
- In the Data View area, Name column, click the name of the data view you want to copy.
- In the Data View area, click Save As.
- In the New Data View name field, type the name of the new data view and select the type of data view it is.
- Click OK.The new Data View you created and its parameters now display in the Data View field.
- In the Data Element Category list, select a table to choose a data element table.The list of elements for the table you selected displays.
- In the Selected Fields list, select the elements and use the right arrow to add a field or fields to the data view or in the Selected Fields list, click the field and use the left arrow to remove a field from the data view.
NOTE: We recommend that every Matched Data View contains: (1) Client Key from the source file, (2) D&B DUNS Number, (3) Match Grade, and (4) Confidence Code.
- In the Label column, if you prefer to label a field differently than the default label, type a new label next to the field to change the label that displays in the Data View for that field.
- In the Sort column, select Asc for Ascending sort order, Desc for Descending sort rode, or None for the default to select a sort order for a field in the data view.
- In the Selected Fields list, select the field and use the Up or Down arrow to change the order to change the order in which the fields will be listed.
- Click Save.
NOTE: After you click Save, the new data view is automatically assigned as the default data view for the batch workflow.
Assigning Default Data Views
After you have created your data views, you need to assign the data view to a batch workflow. You can assign default data views to the following:
| Data View | Assigns a Default Data View for … |
|---|---|
| Matched data view | The matched results for the current batch template. |
| Unmatched data view | The unmatched results for the current batch template. |
| Allrecords data view | All records for the current batch template. |
| Logical Site data view | The Logical Site view of your batch results. |
| Candidates data view | The current NLMI batch workflow template. |
NOTE: Only Candidates data view is available for the NLMI Batch Workflow. And, as part of v6.7, whenever you change a data view for a workflow, by default, that particular data view becomes the default.
To assign a default data view:
- On the Home page window or the Navigation window, click Batch.
- In the Batch window, select a Batch Workflow template.
- In the Post-Matching phase area, click Matched Data View, Allrecords Data View, or Unmatched Data View.
- Depending on which data view you selected in the previous step, in the Matched Data View column, the Allrecords Data View column, or the Unmatched Data View column, select the radio button for the appropriate data view to assign a default data view for the current batch workflow template.
- In the Logical Site Data View column, select the radio button for the appropriate data view to assign a default data view for the Logical Site view of your batch results.
- Click Apply.
- © Dun & Bradstreet, Inc. 2019 – 2026. All rights reserved.